How a Fibreglass Pool Is Installed: Steps & Timeline
Every step of fibreglass pool installation — site visit to first swim in 10–12 weeks, 28 days on site. From a Brisbane installer's build sheet.
Published · Updated
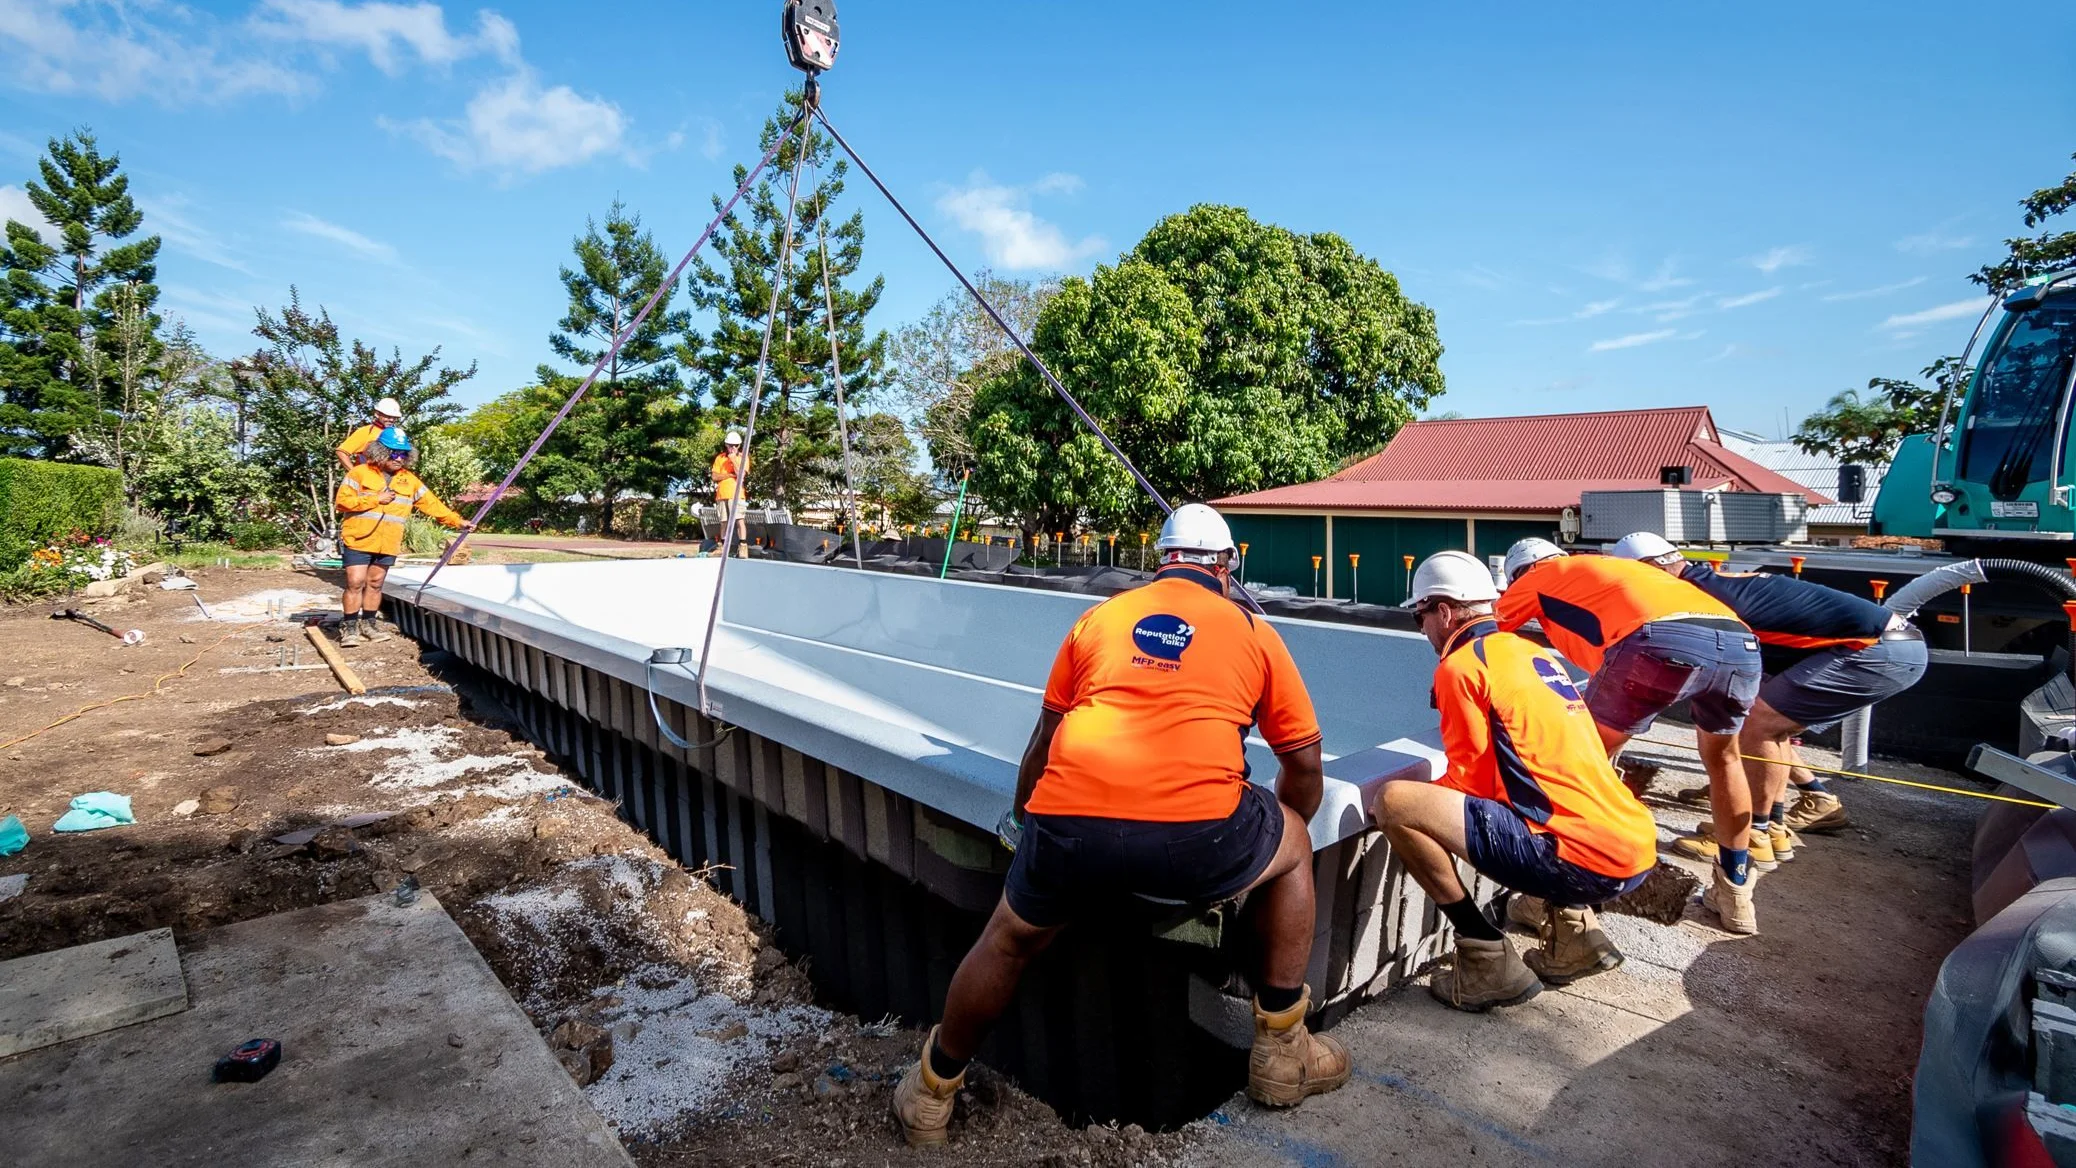
A fibreglass pool is delivered as a single factory-moulded shell. Fibreglass pool installation (fiberglass in US spelling) is the process of placing the shell in the ground and completing the surrounding work.
Installation involves the following steps:
- Excavate a hole to match the shell’s dimensions.
- Prepare and level the base.
- Crane the shell into position.
- Connect the plumbing, filtration, and electrical systems.
- Fill the pool while backfilling around the walls.
- Pour the concrete surround.
- Install the coping and paving.
The shell is installed and filled with water on the same day the hole is excavated. In Brisbane and South East Queensland, the full process takes 10–12 weeks from first contact to swimming. This includes about 28 days of on-site construction. The remaining time covers design, contracts, and council approval. Because the shell is manufactured in a factory, on-site work is completed within weeks.
How is a fibreglass pool installed? The steps before the dig
Before excavation, the installation process includes a site visit, 3D design, contract, council approval and pre-start site visit.
The initial site visit is free and takes one to two hours. The installer measures the yard, inspects the soil and confirms access is assessed. This includes checking where a crane can set up, how the shell will travel over the house or fence, and where a truck can reach. Pricing is provided during the visit.
The installer then creates a 3D render of the pool in your backyard. This helps confirm the pool model, position and size before you commit.
The contract specifies the pool model, colour, inclusions, timeline and price. The selected model comes from the fibreglass pool models range. The contract assigns a specific shell and finished price to your site.
Council approval is handled by the installer. This includes DA or CDC applications, engineering certificates, compliance with Queensland pool fence regulations and communication with the council. Approvals take two to four weeks. You receive copies of all lodged documents.
Before excavation, the Construction Manager conducts a pre-start site visit lasting 1.5 to 2 hours. During this visit, the manager confirms machine access, shell position, equipment position and finished levels. Excavation and crane work are booked after these details are confirmed. Any access or level issues can then be resolved before installation day.
What happens on installation day?
On installation day, the hole is dug, the base is prepared, and the pool shell is moved into position. The plumbing, filtration, and electrical systems are then connected. The pool is filled with water on the same day.
Site preparation and excavation follow a dig sheet that specifies the shell’s length, width, depth profile, and required working clearance. A licensed excavation team digs the hole to these specifications.
The team then creates a screeded, level base for the shell. After the shell is installed, the team checks the level again before adding backfill.
The Aqua Technics pool shell is factory-built with Graphene Nano-Tech in the laminate. It arrives in one piece by truck. A crane moves it over the house or fence when required. If site access allows, the excavator can move the shell instead.
After confirming that the shell is level, the team installs and connects the plumbing and filtration lines. The electrical system is also connected.
The pool is then filled with water.
How long does a fibreglass pool installation take?
A fibreglass pool installation typically takes 10 to 12 weeks from initial contact to swimming. On-site construction takes about 28 days.
| Weeks | Stage | What happens |
|---|---|---|
| 1–2 | Design and 3D render | Free 1–2 hour site visit; yard measured, access and soil assessed; price given on the spot; pool rendered in your backyard |
| 2–6 | Council approvals | DA/CDC applications, engineering certificates, barrier compliance — all handled by the installer |
| 6–8 | Pre-start and scheduling | 1.5–2 hour pre-start visit with the Construction Manager; excavation and crane booked |
| 8–9 | Excavation and installation day | Dig to the dig sheet, screeded base, shell craned in, plumbing and electrical connected, water in the pool |
| 9–10 | Concrete and paving | Concrete surround poured, coping and paving laid |
| 10–11 | Handover and Pool School | Final clean, equipment and water chemistry walkthrough, first swim |
On-site construction takes approximately four weeks, or 28 days. This is a firm commitment rather than an estimate.
The period from signing the contract to excavation averages six to eight weeks. This includes one to two weeks for design and two to four weeks for approvals. The remaining time covers scheduling.
Council approvals and scheduling account for most of the 10–12 week installation period. Excavation, shell installation, concrete, paving and handover occur during the on-site construction period.
Can you install a fibreglass pool yourself?
Yes. Fibreglass pool shells are available as DIY kits in Australia. A kit includes the shell only.
A turnkey installation includes the shell, excavation, crane hire, licensed plumbing, licensed electrical work, equipotential bonding, engineering sign-off, council approval and the concrete surround. With a DIY installation, you must arrange and pay for each item separately. Licensed work must be completed by licensed trades.
A kit price pays for one component. An installed price covers the completed pool. The price difference includes excavation, crane hire, plumbing, electrical work, engineering, council approval and concrete.
| DIY kit purchase | Turnkey installation | |
|---|---|---|
| Fibreglass shell | Included | Included |
| Excavation | Contracted separately | Included |
| Crane hire | Contracted separately | Included |
| Plumbing | Licensed plumber, engaged separately | Included |
| Electrical + equipotential bonding | Licensed electrician, engaged separately | Included |
| Engineering sign-off | Owner arranges | Included |
| Council approval + barrier compliance | Owner arranges | Handled by the installer |
| Concrete surround | Contracted separately | Included |
In Queensland, the same requirements apply to DIY and professional pool installations. These include council approval, engineering certification and pool barrier compliance. Plumbing and electrical connections must be completed by licensed trades.
A DIY installation also requires accurate planning and coordination. The excavation must match the shell, the base must be level, crane access must be available, and services must be connected and certified. A professional crew manages these tasks as part of the installation. An owner-builder must specify, schedule and check the work completed by each subcontractor.
What surrounds the shell: coping, paving and backfill
Coping is the hard edge that covers the rim of a fibreglass pool shell. The shell has a lip at the top. Coping covers this lip and connects the pool to the surrounding paving or decking.
Common coping materials include poured concrete, natural stone pavers and concrete pavers. Timber or composite decking boards can serve the same purpose when a deck extends to the pool edge. Coping pavers use a bullnose or drop-face profile to provide a finished edge at the water.
The coping material usually matches the surrounding surface. Pavers provide a defined edge and can be replaced individually. Poured concrete provides a continuous surface. Decking can connect the pool to an entertaining area. The choice between decking and paving affects the design of the entire outdoor area.
On our builds, Category 1 stone pavers are the standard inclusion. A second row of paving is added at the deep end.
Below the paving, backfill does structural work. Water inside the shell pushes outward, while backfill outside the shell pushes inward. The pool is filled with water as backfill is placed around the walls. This keeps the pressure on each side balanced and the walls evenly loaded. Backfill is a structural part of the pool.
What can go wrong with a fibreglass pool installation?
Common installation problems involve electrical work, bonding, equipment placement, the pool base, shell levelling, plumbing, and backfilling. These problems can be prevented during installation.
Some contracts exclude the electrical connection. This can result in a separate electrician’s bill after the pool installation is complete. Before signing, check that the contract includes the electrical connection.
Equipotential bonding means connecting the metal components around the pool so that no voltage difference exists between them. This is licensed electrical work and must be verified by a certificate. The electrician must complete and certify the bonding before paving is installed.
The filtration equipment location affects ongoing pump noise. For example, equipment installed against the house can create noise near a window. Confirm the equipment location during the pre-start visit.
The base must use suitable material and be compacted correctly. A poor or uncompacted base can settle and leave the shell out of level. Level the shell in the excavation and confirm its position before adding backfill. The level cannot be corrected after backfilling.
Plumbing is buried under backfill and concrete. Repairing a leak after handover can require cutting into the finished surround. Pressure-test the pipework before burying it, while all joints remain accessible.
Incorrect backfilling can cause the pool walls to bulge. Backfill can press the walls inward if it is placed incorrectly or without enough water in the pool. Add backfill progressively while filling the pool to keep the walls straight.
What does a fibreglass pool installation cost?
A professionally installed fibreglass pool is quoted as one turnkey figure. This includes the pool shell, excavation, crane, filtration, approvals, and paving. Current installed price ranges vary by pool category:
| Pool size | Length | Depth | Installed from |
|---|---|---|---|
| 3m to 4m | 1.45m level | $47,233 | |
| 4m to 5.5m | 1.0m to 1.78m | $47,706 | |
| 6m to 7m | 1.0m to 1.88m | $56,656 | |
| 7.2m to 8m | 0.98m to 1.96m | $60,475 | |
| 8.25m to 11m | 1.0m to 2.0m | $69,428 |
Live all-inclusive installed pricing for standard site conditions in South East Queensland — updated straight from our quoting system.
The final installation cost depends on site access, slope, soil conditions, and existing features in the yard.
The MFP Easy installation process runs the same way for every build. It includes:
- Weekly updates from a named contact
- Two cleans during construction
- One clean at handover
- A Pool School session at handover covering equipment, water chemistry, and maintenance
- A service check-in after 30 days
FAQs
Does a fibreglass pool have to be in the ground?
No. A fibreglass pool can be installed fully inground or semi-inground. Semi-inground installations are partly above ground and may suit sloping blocks. The exposed walls require engineered support. The engineering certification must cover the raised design. Queensland pool barrier rules apply at all installation heights.
How fast can a fibreglass pool be installed?
The shell is typically installed and filled with water on the same day the hole is dug. Council approval takes two to four weeks, followed by pre-start planning and scheduling. Concrete and paving are completed after the shell is installed. The full process usually takes 10 to 12 weeks from first contact to swimming, including about 28 days on site.
Is it difficult to install a fibreglass pool?
Installing a fibreglass pool requires precise planning and coordination. The excavation must match the shell dimensions, the base must be level, and the crane requires clear access. Licensed trades must complete the plumbing and electrical connections. A professional crew coordinates these tasks. An owner-builder must specify, schedule, and verify each task across multiple subcontractors.
What are common problems with fibreglass pools?
Common installation problems include:
- A pool shell that is not level
- Wall bulging caused by poorly placed backfill
- Leaks in underground plumbing
- Missing equipotential bonding
To prevent these problems:
- Confirm that the shell is level before backfilling.
- Add backfill progressively while filling the pool.
- Test pipework before burying it.
- Obtain a licensed electrician's bonding certificate for metal components around the pool.